|
Tech Tip #1 - Wico Coil Replacement Re-Fired
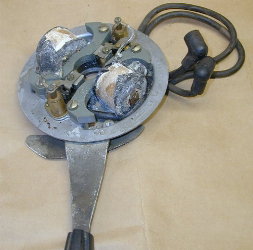
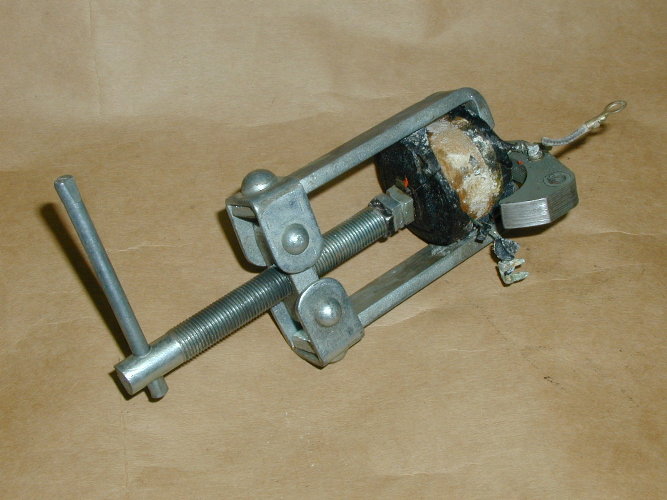
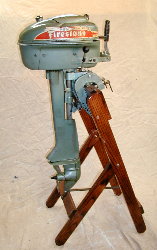
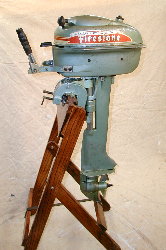
- Wico Coil Replacement Outboards made from the early 1950’s to mid 1960’s have close to a 100% failure rate for the original magneto coils. This is often due to the plastic insulating the coil being unstable and shrinking with age. The force of the shrinking plastic, moisture intrusion or other issues will cause the windings to short and the magneto will not produce spark. Even if a cracked coil works on the bench, it will almost certainly fail with use out in the field. Replacement coils for OMC, Repco and Bendix magnetos are readily available but Wico coils have been difficult to find and cost prohibitive when they do turn up, (and the value of many old outboards do not warrant a $60-$80 investment in coils). Inexpensive replacement coils for OMC magnetos, (O.E. part # 582995 or Sierra# 18-5181), can be used to repair Wico coils fitting a 7/16” diameter laminate. (The laminate is the steel "E" shaped part the winding/coil fit over - the center spindle must be 7/16" x 7/16" in size.) The repair is quite easy and both coils can be replaced in about an hour. Start by removing the flywheel and stator/magneto plate from your outboard. The example below (illus #1), is from a ‘53 Firestone 5hp produced by Scott-Atwater. Note the large chunks of plastic missing around the coils!
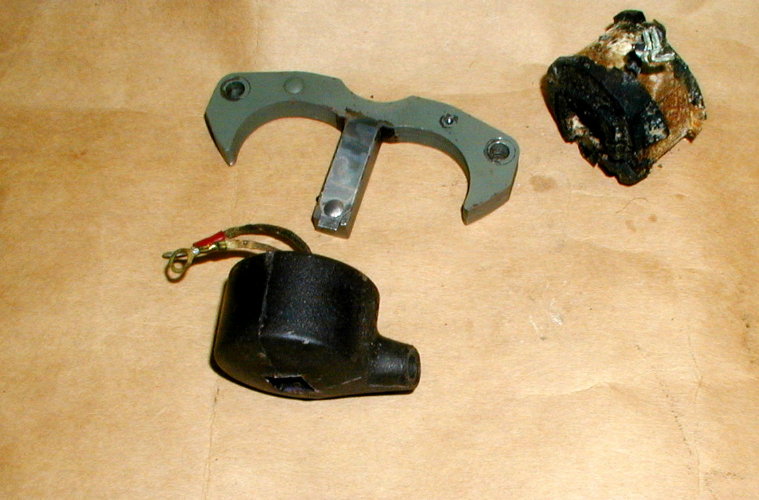
Examine the magneto; take note of how each coil is wired to each set of points & capacitor and determine which coil fires the top and which fires the bottom cylinder. (Use of a Sharpie marker to note these details on the magneto plate is a good way to avoid any confusion later.) This is also a good time to check the wires, test the capacitors and clean the points – replace any components that do not check out. The original Wico coil was matched to X5463 capacitors rated at .16 to .20 microfarads. Since OMC coils call for capacitors, (OMC part #580321), rated at .18 to .22 microfarads, there should not be a problem using the original Wico capacitors with the OMC coil. (On motors used many hours, check the points for pitting since this will indicate if the capacitors are a good match. For hobbyists who only put a few hours on their motors each season it is unlikely the points will ever become worn due to the 2 microfarad difference. ) To keep things straight, replace one coil at a time. In Illus #2 below note the plug wire for the other cylinder under the coil being removed – on reassembly it will be re-routed in back of the new coil for space reasons.
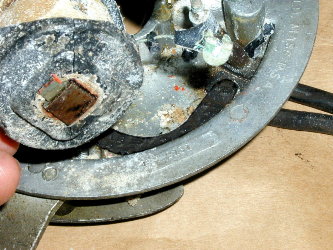
The original Wico laminate will need to be reused. Remove the ground wire from the screw into the laminate and gently bend down the small metal tab that holds the coil on the center laminate. (see illus #3) Using a press or puller, push the laminate out of the coil. (See Illus #4) The use of ¼”-20 “farm nuts” (the square ones) stacked and held together with a lopped off screw, make a 7/16” spacer to push the laminate out of the coil. A little penetrating oil here won’t hurt anything and could make sliding the laminate out easier.
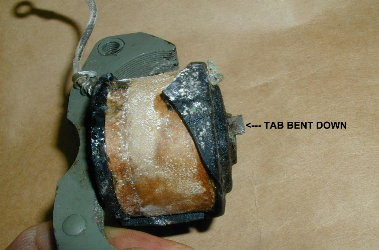
Once the coil is off, clean any rust or goop off the laminate. Now do the same steps to remove the OMC coil from its laminate, taking care not to damage the coil. Don’t forget to bend down the small tab that holds the OMC coil on – in this case don’t worry if you break it, you will not be re-using the OMC laminate. (NOTE: As of 2009 many of the aftermarket OMC coils no longer use the small metal tab. They have 2 or 3 small dimples into the plastic at the end of the center laminate. I use an X-acto knife to remove the dimple next to the laminate, then remove the coil in the regular way.) An OMC coil from a parts motor was used for this project – it easily slid off the laminate by hand. FYI, if using re-cycled parts, be sure to test them and ascertain they are in working condition before installation.
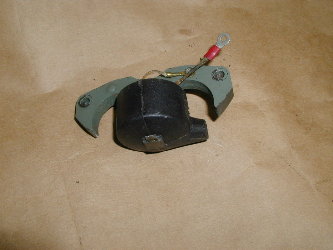
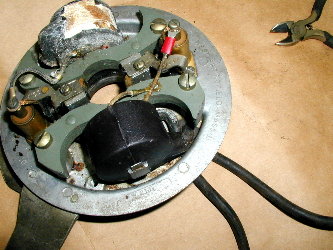
Slide the OMC coil onto the Wico laminate; it should go on by hand without force (see illus #6). Attach the ground wire to the laminate using the original screw and bend the tab up to hold the coil onto the laminate. Now simply attach the plug wire and install the coil/laminate assembly into the magneto plate. Remember on this side we needed to route the other plug wire (as seen in Illus #2) in back if the new coil since it will no longer fit underneath as with the original Wico coil. (see Illus #7 - wire is just visible on the right of the new coil) The OMC coils have a molded plastic protrusion where the spark plug wire goes into the coil – this is tight against the side of the magneto plate but will fit. (For this application the plug wire needs to make a 90 degree bend to exit bottom of the magneto plate - even though the original wire was serviceable a new Packard 440 wire core ignition cable was used since it more easily made the sharp turn.) Lastly hook up the primary lead to the capacitor and now you are ready to move on to the second coil. Replacing the second coil is the same procedure as the first only without the worry of re-routing the other plug wire. Once completed, remount the magneto plate and set the points to the proper specification (.020 on this motor). Replace the flywheel and check for binding of the laminate heels on the magnet or counterweight. (Unlike OMC coils, there is not really any provision for adjustment so this should not be a problem.) Rope it over to check the spark, there should be a nice healthy blue flash! A motor with this magneto repair has been run several hours and performs very well, starting easily and idling nicely. One additional note; after a few hours of use it was found that the original spec Champion H-10J plugs appeared to be too hot, H-8J (now called H8C) have been substituted in an attempt to remedy this. EDIT 7/12: Here are a few photos of other substitutions done using the OMC Universal magneto coils. The OMC coils have provided fixes for Wico, Phaelon, Eisemann and other coils that are hard to get or NLA:
About this Article
Please use common sense when working
on anything involving gasoline. Practice good shop techniques
and work safely and cleanly. Don't forget to visit our DISCLAIMER
before you contemplate doing anything presented on this website.
|